
Most drivers may never have given much thought to how well their car’s coolant/antifreeze is protecting the engine. But with winter on the way, now is the ideal time to test the fluid’s effectiveness and make sure your car is fully protected going into the coldest of seasons.
But how exactly do you test coolant/antifreeze? Surely it’s a job best left to the professionals, right?
Actually, testing the quality and performance of your car’s coolant/antifreeze is easy, and you can do it just a couple of minutes with the right tool.
This guide will show you how to check your car’s coolant/antifreeze, so you can be confident your engine is fully protected in all conditions. We’ll also show you how to manually pressure test your car’s cooling system so that you can check for leaks and more accurately diagnose internal problems yourself.
Quick Links
Blog Sign Up
"*" indicates required fields
How to Test Your Car’s Coolant/Antifreeze
Stop! Don’t go any further! Is your car cool? If not, you risk burning yourself, so make sure the engine has been switched off for a good while before you do anything to the cooling system.
Before you test the coolant/antifreeze, it’s worth giving it a visual check, as this can tell you a lot about its condition and whether there’s a problem.
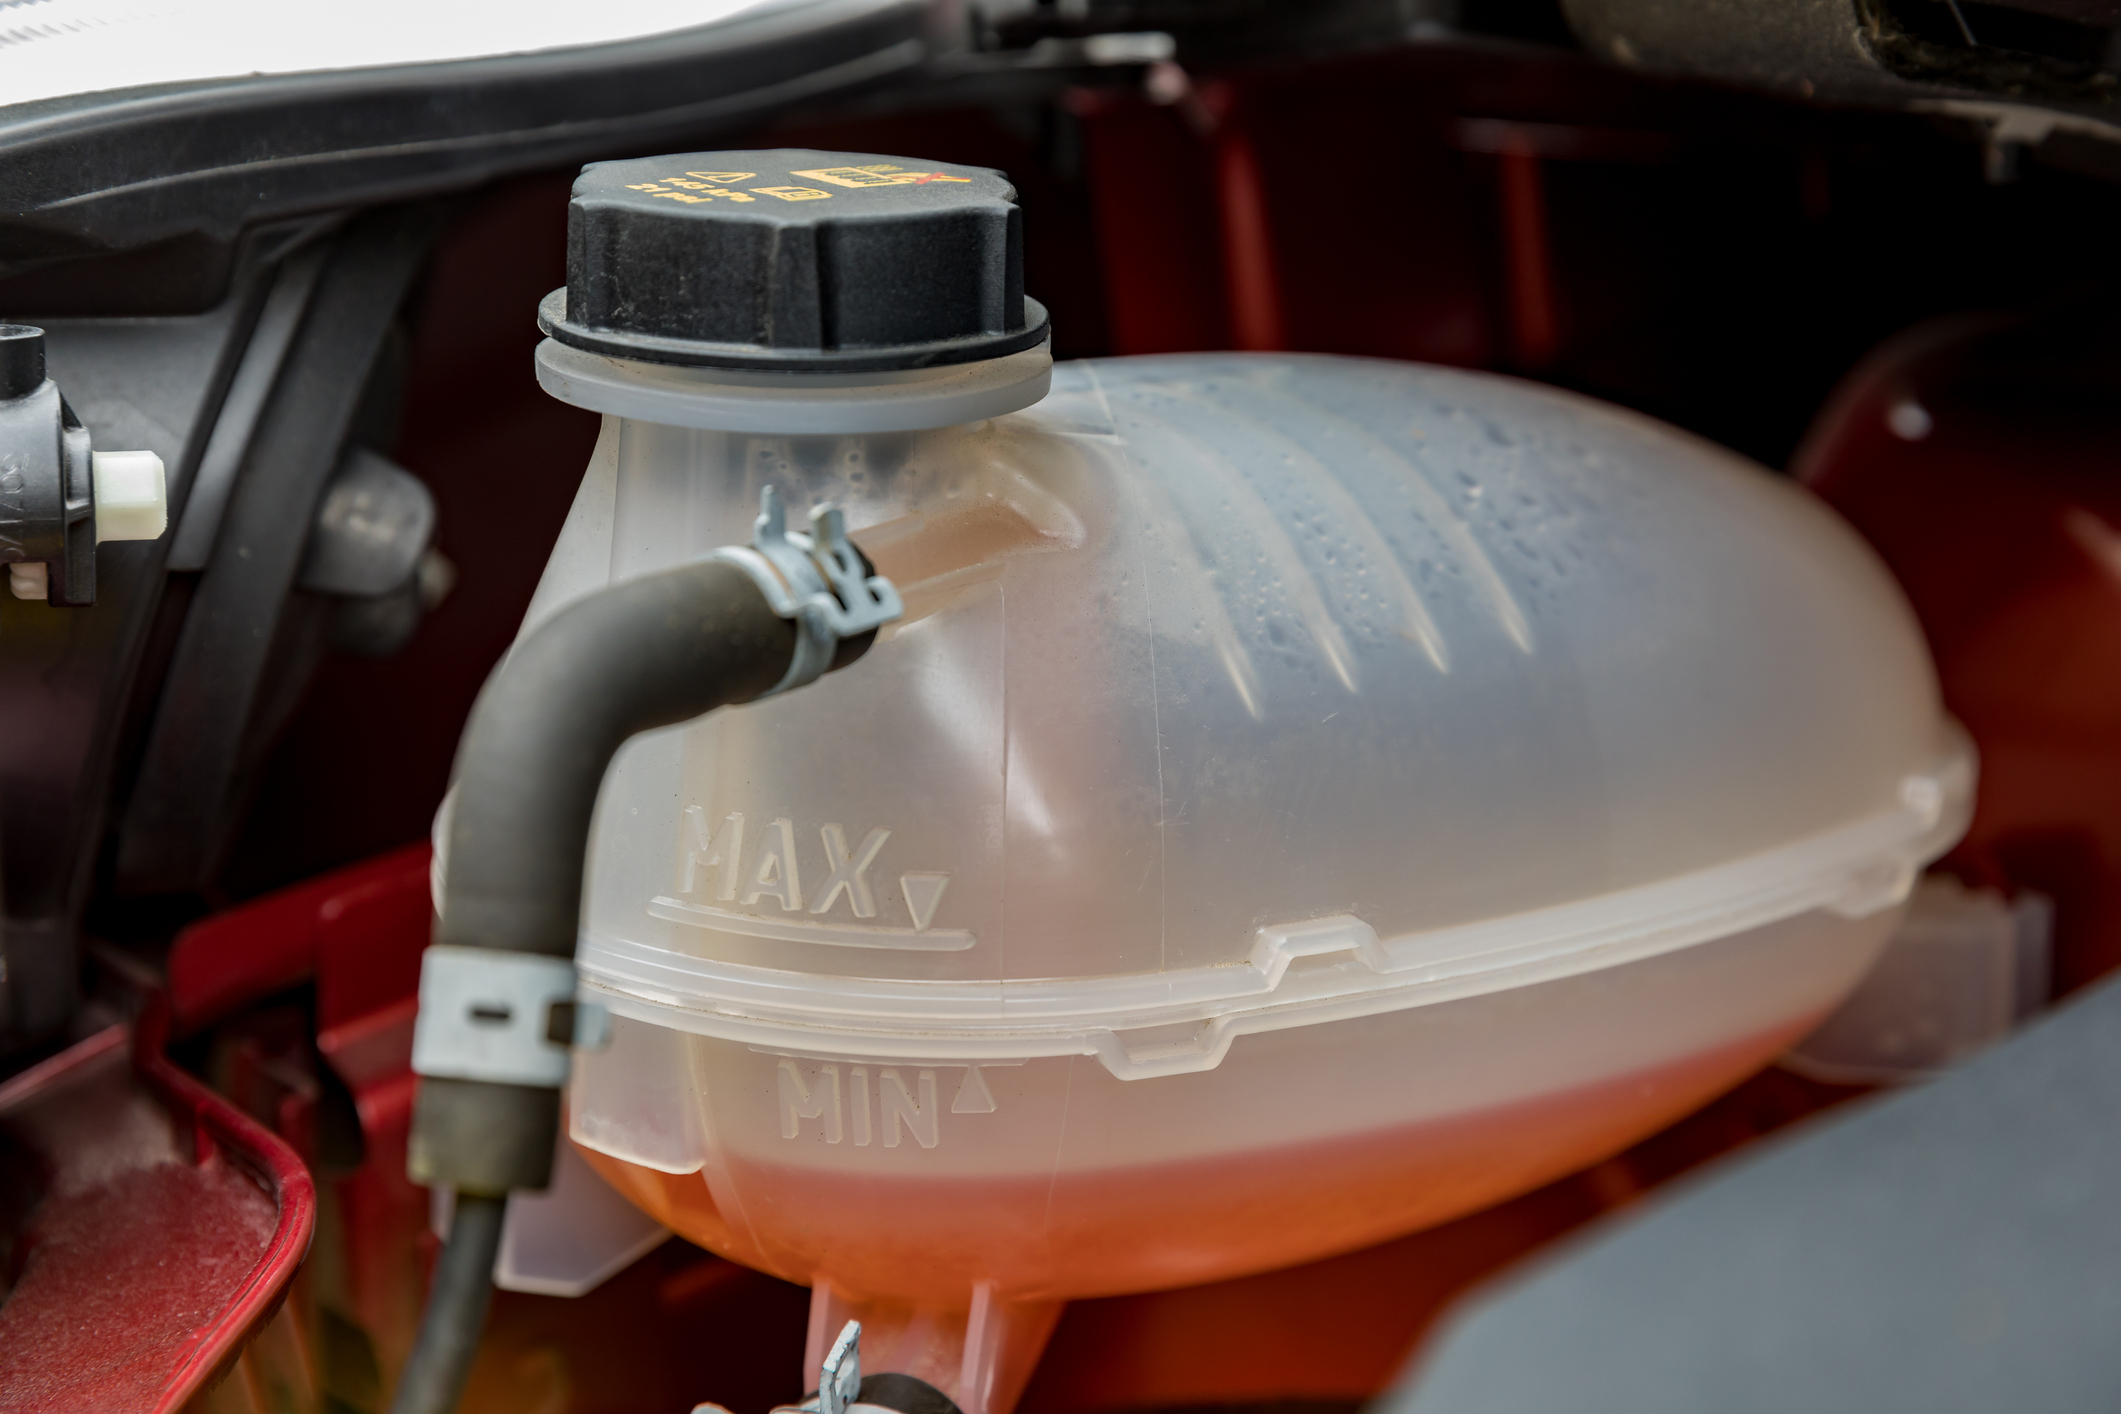
Something you should be doing regularly anyway, start by checking the coolant level on the side of the reservoir.
Ideally you want the coolant sat on the ‘max’ fill line, so if it’s not, top it up and check daily to see if the level has changed. If the level drops, the system may have a leak – in which case it’s time to call the garage.
Is the level OK? Then you’ll want to look at the coolant itself. What colour is it? Does it look dirty or discoloured? Can you see bits floating in it?
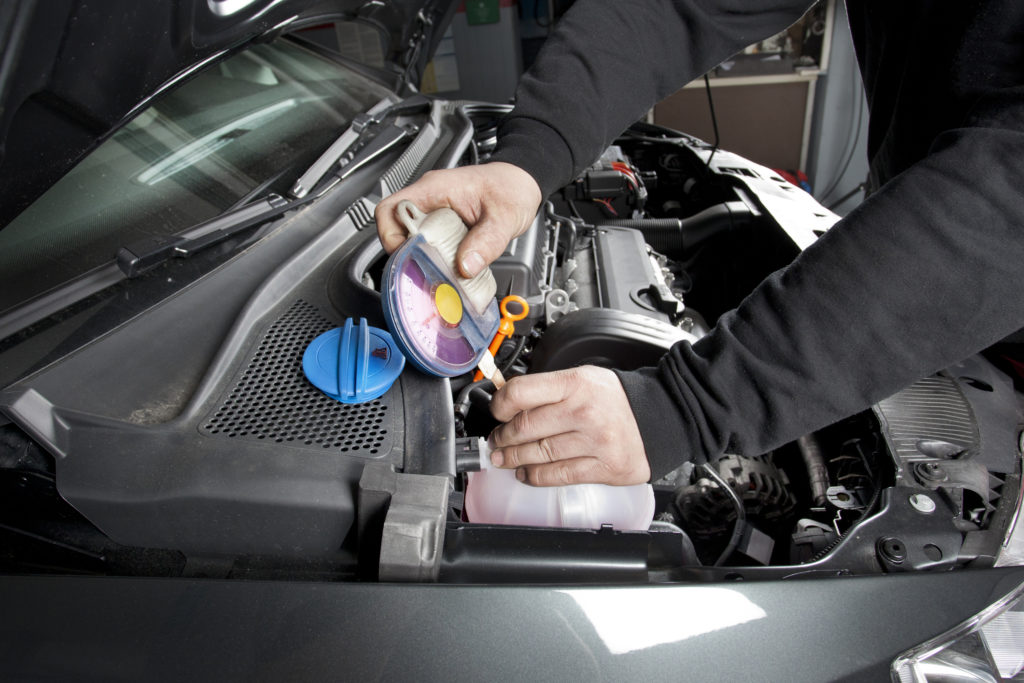
It’s not that easy to check the condition of the coolant/antifreeze through the reservoir tank. So to have a proper look, you’ll need a coolant/antifreeze tester.
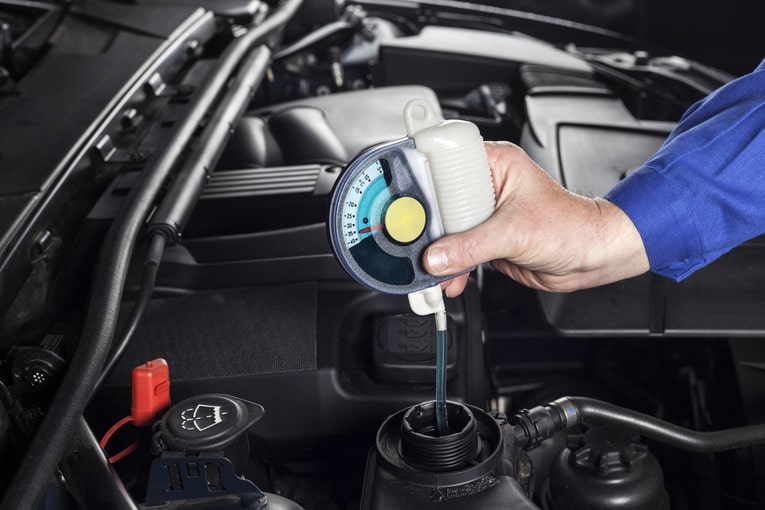
A coolant/antifreeze tester is essentially a pipette attached to a small container. You can use it to get a sample of coolant from the reservoir.
Once you’ve extracted some coolant, the tester’s in-built gauge will show you the level of freeze protection the fluid is offering. And because the container is see-through, it’ll be easier to look at the condition of the coolant.
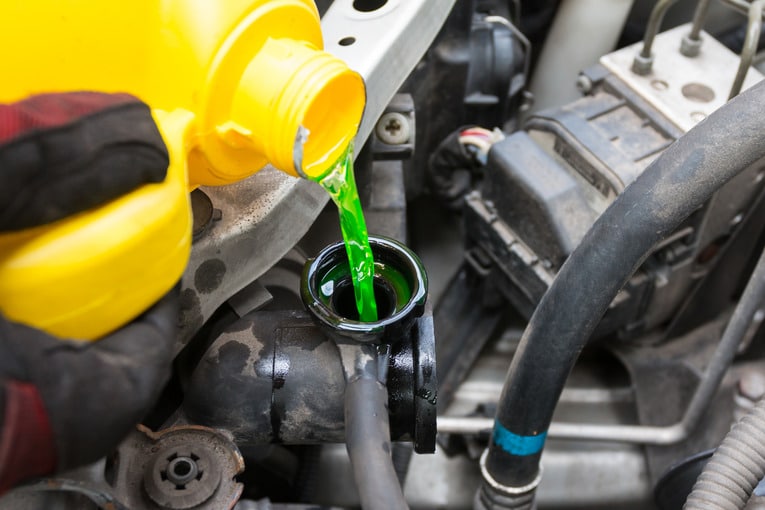
If it looks cloudy, dirty or full of particles, or if the freeze protection is down on the gauge, we’d recommend flushing the system and refilling with winter-ready coolant/antifreeze.
So to recap, here’s a quick guide on how to test your car’s coolant/antifreeze:
- When the engine is cool, perform a visual check of the coolant/antifreeze in the reservoir. Is it topped up to the ‘max’ fill line? What does it look like?
- Open the reservoir cap to take a sample of coolant/antifreeze. It’s vitally important that you do this when the engine is cold, otherwise you risk burning yourself from steam.
- Using a coolant/antifreeze tester, take a small sample from the reservoir. Close the reservoir cap while you check the coolant to prevent dirt getting in the system.
- Check the coolant in the tester. What is the freeze protection level and how does it look? If there are any signs of dirt or particles or its protection is fading, it’s worth replacing it.
Tip – when buying a coolant/antifreeze tester, make sure you get one that measures ethylene glycol. A lot of testers measure alcohol only, but this doesn’t tell you all you need to know about the level of protection your coolant is offering.
Why Do I Need to Check My Car’s Coolant?
Coolant/antifreeze can often go unchecked for long periods. Sure, a mechanic will look at the level as part of an annual service, but it’s not changed regularly like oil.
Of course, this is usually a good thing. If your car is topped up with premium coolant/antifreeze like Prestone, protection is guaranteed for a minimum of 10 years, which can save you a lot of time and money in the long term.
But if you aren’t sure when the coolant/antifreeze was last changed in your car, or you’ve recently bought a new used car, it’s important to test it to make sure the engine is protected.
When coolant/antifreeze is past its best, it no longer offers the same protection against extreme temperatures and corrosion. So if you don’t replace it, your engine is at risk from freezing and wear and tear, which could lead to costly repairs due to the damage.
What Should I Do if There’s a Problem with the Coolant/Antifreeze?
If something isn’t right with your car’s coolant/antifreeze, there are a few things to try. Here are a selection of pointers to help you troubleshoot different problems.
My coolant/antifreeze level is down on the reservoir
If the level of coolant in the system is down, there may be a small leak that will need fixing.
To check for this, top up the system and check the level every day. We’d recommend taking a photo so you can keep track.
Has the level dropped? There’s more than likely a leak which you should repair as early as possible to avoid bigger problems.
My coolant/antifreeze is dirty but is still offering good freeze protection
Have you spotted dirt and particles in the coolant while testing it? This could be a sign that the cooling system is in poor condition and needs flushing to remove dirt and deposits.
Over time, small particles of debris can build up in the channels of the cooling system, where they can contribute to increased corrosion and wear. That’s why you should always flush the cooling system before adding fresh coolant/antifreeze.
Using a product like Prestone Cooling System Flush is a great way to remove scale, deposits and contaminants from the system in between batches of coolant/antifreeze. The product does a better job at clearing dirt and sludge than water alone, so you can be confident that you’re adding fresh coolant/antifreeze to a completely clean and clear system.
My coolant/antifreeze isn’t offering good temperature protection
Temperature protection is vital for ensuring long-term engine health, so if your coolant isn’t protecting against extreme heat and freezing, it’s time to change it.
A premium coolant/antifreeze like Prestone offers temperature protection from -37°C to +129°C. That gives you the peace of mind that your engine is protected in all conditions, and at all times of the year.
Pressure Testing Your Coolant System
If you suspect that your car’s cooling system has sprung a leak, finding the source of the problem can be tricky and frustrating. Why? Often, leaks don’t occur until the engine is running and the system is up to pressure, at which point it becomes more difficult, even dangerous, to figure out where the leak is happening.
So, what’s the solution? Pressure testing. This is when you pressurise the cooling system without the need to turn on the engine, mimicking the conditions in which a leak is likely to occur – without the risk of scalding yourself with boiling hot coolant/antifreeze or steam.
Let’s take a look at what pressure testing is and how it works in a little more detail.
What is Pressure Testing?
Pressure testing is when you pressurise a cooling system to check for leaks. With the system pressurised, it becomes much easier to diagnose a leak and spot where fluid is escaping from.
This procedure is carried out with a pressure tester, an inexpensive, portable device that’s designed to attach to the fill cap of standard cooling system expansion vessels. The device pumps air into the cooling system to pressurise it; after that, it’s up to you to monitor the pressure and check for any leaks that might be occurring at different points around the engine.
When to Carry out a Pressure Test
Pressure testing is typically carried out when a coolant leak is suspected but is proving difficult to locate. For instance, you may notice that your cooling system constantly requires topping up, without there being any visible leakage around the engine bay.
Since a pressure tester allows you to check for leaks without the engine being hot, it’s the go-to option for safe and efficient cooling system leak diagnosis.
Where to Buy a Pressure Tester
Cooling system pressure testers are generally quite affordable and readily available from automotive stores as well as other online retailers. They’re suitable for at-home, DIY use, too, though it’s important to follow the instructions on the device carefully to ensure safe and effective operation.
How to Pressure Test Your Coolant System
Got yourself a pressure tester? Here’s how to use it to check for leaks on your car’s cooling system.
- Make sure the engine is completely cool before you start.
- Remove the cap from the cooling system expansion vessel and set it aside somewhere safe.
- Attach the nozzle of the pressure tester to the neck of the expansion bottle, referring to the instructions that came with your device to ensure a tight fit.
- Switch on the device and select the required PSI. The expansion bottle cap should state the safe operating pressure of your car’s cooling system.
- Use the device to pressurise the system and allow it to run for around 3-5 minutes.
- Using a good bright torch, begin assessing the engine for any signs of leaks. You’re looking for drips, bubbling, or the sound of escaping air. Spot any of these, and you’ve found your leak.
- No visible sign of leakage? Check the device to see if the pressure has dropped. If it has, this indicates an internal leak in one of the components, which will also require fixing to remedy the problem.
- And that’s it – pressure testing complete. Switch off the device and initiate any decompression steps before safely removing it from the expansion vessel. Be sure to read the enclosed instructions carefully before removing it from your car.
How Much PSI Do I Need for a Coolant Leak Test?
While the normal operating pressure of vehicle cooling systems can vary, most cars run at approximately 15 PSI or 1.1 bar. As touched on in the steps above, the cap of the expansion vessel should detail the recommended pressure of your car’s cooling system. Do not exceed this pressure, as doing so could strain components and make the problem worse.
Testing your coolant/antifreeze and cooling system is a job worth doing throughout the year to ensure maximum protection for your car’s engine. For more help and advice, visit the Prestone blog or check out our full product range.

Does Claiming for Windscreen Damage Affect Insurance Premiums?
A crack, chip or any other damage on your windscreen can be a huge inconvenience. Not only does it impair visibility, but it could also mean an instant MOT failure. And the worst part of all, it could affect your insurance premium if you decide to make a claim. Or could it? In this guide,
What to Do When Your Power Steering Fluid Leaks
Power steering fluid has an important role to play in maintaining safe handling while making sure your car is easy to manoeuvre at low speed. So if it leaks it’s bad news for your car, your driving experience and your wallet. The good news is power steering leaks aren’t all that common, particularly on newer,
All You Need to Know About Brake Kits
Could your car use some extra stopping power? A brake kit could be the answer. Designed as an off-the-shelf, out-the-box solution, these handy kits have everything you need to upgrade your car’s braking system. But are brake kits really all they’re cracked up to be? And what should you consider before parting with your cash?
Simple Ways to Improve Your Radiator’s Efficiency
Car radiators perform one of the most important jobs there is beneath your car’s bonnet, removing heat from the engine to keep it working properly. So, if you want to get maximum performance and efficiency from your car while also reducing the risk of overheating and damage, it’s vital that the radiator is well maintained and