Planning a trip this summer with a caravan or trailer? You’ll need to make sure your car’s got a tow bar that’s properly fitted and up to the job.
You can fit them yourself at home if you’re handy with cars – it can be a bit complicated so you’ll need the right tools, so if you’re not sure you might be better off getting a professional. But if you’re happy doing car maintenance yourself and fancy a new challenge, we’ve got all the info you need here.
Quick Links
- Before You Get Started – Choosing Your Tow Bar
- Types of Tow Bar
- Choosing the Electrics
- Attaching Your Tow Bar
Before You Get Started – Choosing Your Tow Bar
Think about what you’ll be using the tow bar for, including;
- What you’ll be hauling
- How much weight it’ll have to pull
- How much weight your vehicle is able to tow; it’s no good fitting a tow bar if your car’s not up to the job. The maximum weight your car is capable of pulling should be listed in your user’s manual. If not, check the VIN plate. This should include your car’s ‘gross train weight’ – the maximum combined weight of your fully-loaded car and trailer. This must not be exceeded under any circumstances.
- Your make and model of car (you need one which fits your car as the mounting points differ)
Here are some other things to remember before fitting a tow bar:
- Only ever fit a tow bar that’s recommended by your particular manufacturer, and always follow the specific fitting guidelines.
- Your tow bar will come with a detailed instruction manual – make sure you follow it!
- Before you begin, check that you’re not invalidating any warranties by doing the work yourself.
Types of Tow Bar
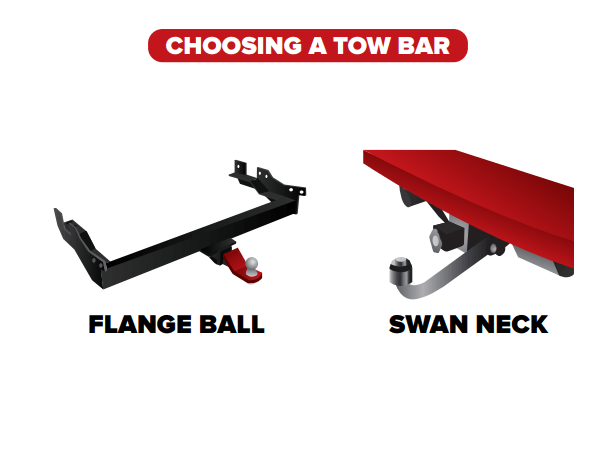
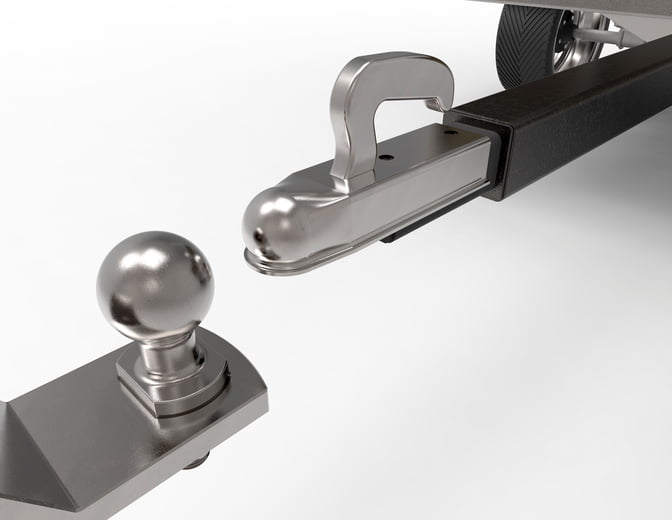
There are basically two different types of tow bars on the market – a flange ball tow bar, and a swan neck tow bar.
Flange Ball Tow Bar
The flange ball tow bar is the most commonly used in the UK, and it’s probably the best option if you’re looking to haul something big, like a heavy trailer or caravan. However, this style has become less popular in recent years as the flange ball design can interfere with the parking sensors on modern cars.
Swan Neck Tow Bar
The swan neck tow bar is more widely used on the continent, and is becoming more common in the UK because of its slimmer, more compact design. But, while it’s the better looking of the two, it’s worth bearing in mind that the swan neck is not always compatible with some towing accessories, such as bumper guards and cycle carriers. Both designs are available as detachable options, so you can remove the neck from the tow bar when it’s not in use.
Choosing the Electrics

While there are universal electric kits available, it’s advisable to go with a dedicated unit, designed specifically for your make and model. While it might be a little more expensive, wiring is so complex on cars today that it’s worth the extra few quid to avoid the faults that might arise with a universal socket.
You’ll have to choose between a 7-pin, 7-pin twin and 13-pin unit.
7-Pin
The 7-pin is the most common and the most cost-effective, and it’s compatible with virtually anything you might connect to your tow bar, from trailers and caravans to horseboxes.
7-Pin Twin
The 7-pin twin gives you some extra power, but the twin connectors can be unsightly, and, unless you need to power internal electrics in your caravan while travelling, such as a fridge or leisure battery, it’s just not worth the extra expense. Full instructions on how to fit your electric socket to your tow bar will be included in your installation manual.
13-Pin
If you’re hauling a caravan that’s under 10 years old, you’ll need the 13-pin connector, as this is fitted as standard on all caravans manufactured after 2008.
Attaching Your Tow Bar
Once you’ve picked your tow bar and electrics, you’re ready to get started. The entire process shouldn’t take more than a couple of hours, and the job will be a lot easier if you can raise the car on a ramp, above an inspection pit, or on a couple of jacks and axle stands. Once you’ve got everything prepared, the first task is to remove the rear bumper.
-
Remove Your Rear Bumper
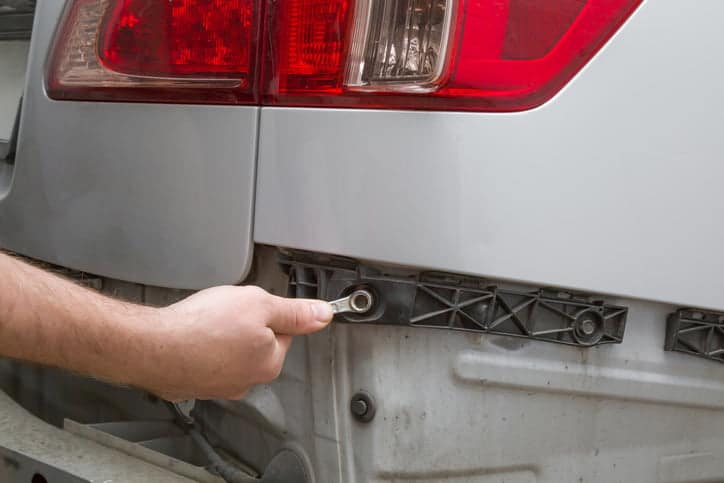
In most cases, you’ll have to take apart your rear bumper in order to fix the tow bar to your vehicle, but the exact process will vary between different makes and models.
For example, if you’re fitting a tow bar to a Peugeot 207 5 door hatch, you won’t need to remove the bumper at all, just the two fixings from the lower edge of the bumper, which conceal the mounting holes in the outer face of the chassis.
Whereas, if you’re working on a BMW 3 series, you’ll have to remove the bumper, mud flaps, side trim and battery cover. In some cars, you may even have to remove the exhaust, so remember to check the installation manual carefully before you get started.
Here are some simple steps to help you remove the bumper easily:
- Before you start loosening bolts, make sure your bumper is properly secured so it won’t fall to the floor and get damaged once it’s detached. Ideally, this is a two-man job, with a mate acting as spotter. Alternatively, you can secure the bumper with rope, to hold it in place.
- To ensure the bumper comes off smoothly and easily, apply a few squirts of Release Spray to the mount points before removing it.
- Once you’ve successfully detached your bumper, store it somewhere safe to prevent any damage.
-
Cut Out Your Bumper
Some cars, such as the Audi A3, will need their rear bumpers modifying in order for the tow bar to fit correctly. This means cutting a piece out of your bumper to make room for the towing apparatus, like the neck and the tow ball. If you do this yourself, here are some pointers:
- Most models have a stencil on the inside of the bumper, clearly outlining the section of the bumper you need to remove. Follow this line and don’t cut anything else.
- Avoid using a jigsaw, as the heat and vibration may damage your bumper, causing paint to bubble or flake off.
- Use a fine-tooth handsaw as this’ll give you the most precise cut, and apply masking tape to the cutting area beforehand to protect the plastic.
-
Install the Crossbar
Now you’re ready to install the crossbar. This is the metal frame that anchors the tow bar to your car’s chassis. Before you get started, there are a few important checks to make first:
- Give the crossbar a once over, and remove any rubber seals from the mounting points.
- Make sure any surfaces of the crossbar that are likely to come into contact with your chassis are properly cleaned before you attach it. This will protect the chassis from rust. Use sandpaper or a scraper to remove any excess dirt or corrosion.
- If you have to drill extra holes in the crossbar before fixing it to the car, these holes need to be properly treated. Make sure the hole is free of any iron grindings or other debris, and apply a good quality anti-corrosion substance.

Once you’re happy with the crossbar, it’s time to attach it to your car. Again, this might be easier with an extra pair of hands, so get a mate to help.
- The crossbar needs to be securely bolted in place, and, as mentioned earlier, these anchoring points differ from vehicle to vehicle.
- After you’ve located the various mounting points where the crossbar will attach to your car’s chassis, fasten all the bolts in place by hand. This allows you to adjust the position of the crossbar later if you need to.
- Once all the bolts are in place, and you’re happy with how the crossbar is sitting, tighten the bolts using a torque wrench, making sure to stick to the prescribed torque settings listed in the installation manual.
- Once the crossbar is secured, seal the seams between the chassis rail and the crossbar using a waterproof sealant, to protect against rust and corrosion.
-
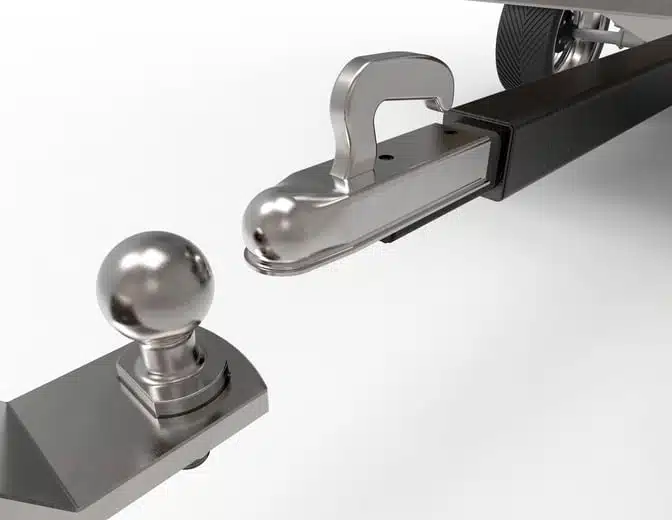
Fit the Neck and Tow Ball
With the crossbar securely in place, it’s time to fit the towing mechanism itself: the flange ball or swan neck attachment that’ll allow you to hitch your car to your trailer or caravan. Your tow bar should include a metal plate or ‘housing’ that attaches to the crossbar; once you’ve fixed this in place, bolt the tow bar neck to the housing, making sure to use the specified torque settings. If you’re using a flange ball design, you’ll also have to fasten the tow ball to the face plate.
Head to the Holts blog for more information to get the most from your car throughout the summer and beyond, click here to visit our homepage.