We’ve covered the basics of restoring car headlights on the Holts blog, but what about repairing them? Is it possible to fix and repair a headlight? Or do you need to replace it completely?
In this guide, we’ll be showing you how to change a headlight bulb, repair a cracked headlight lens, and replace an entire headlight assembly. So, whether your headlights have a small crack or are badly damaged, you should find the solution you’re looking for.
Replacing a headlight bulb, or any other bulb on your car for that matter, is really easy. We’d recommend doing this job yourself if possible, as it’s straightforward and much cheaper than getting a garage to do it for you.
What You’ll Need
A new lightbulb – make sure it’s compatible with your car. The manual can tell you the type of bulb to buy, or you can take the old one into a car parts retailer. Alternatively, sites like Halfords let you input your reg number to find the right type of bulbs.
Phillips screwdriver
Alcohol cleaning wipes – for handling and cleaning the new bulb
Rubber gloves
Change a Car Lightbulb in 4 Steps
Start by locating the rear of the headlight assembly. This will usually be mounted in a gap in the front bumper, which you can access under the bonnet. Check your car’s manual if you’re not sure.
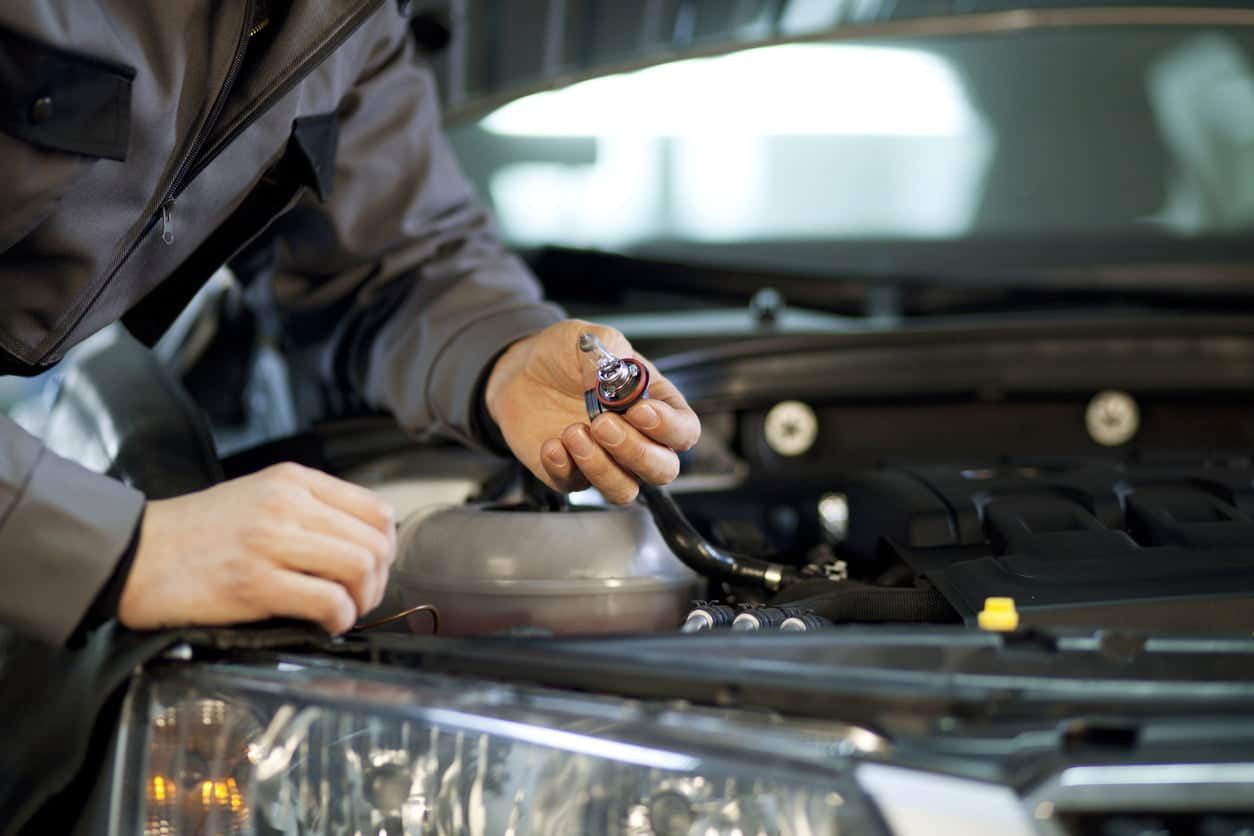
Next remove the power cables from the back of the headlight assembly. They’re normally secured by a plastic catch or screw fitting. Then, you should be able to draw the bulb out of the assembly and remove it.
From here, it’s a case of fitting the new bulb. Make sure you handle it with care; we’d recommend wearing rubber gloves to prevent fingerprints and moisture getting on the new bulb. Wipe it down with an alcohol cleaning wipe to make sure it’s free from lint or any other marks which could shorten its life or impair its performance.
When the bulb is in place, reconnect the wires and be sure to test to make sure the bulb is working – and you’re done.
Can You Repair a Cracked Headlight Lens?
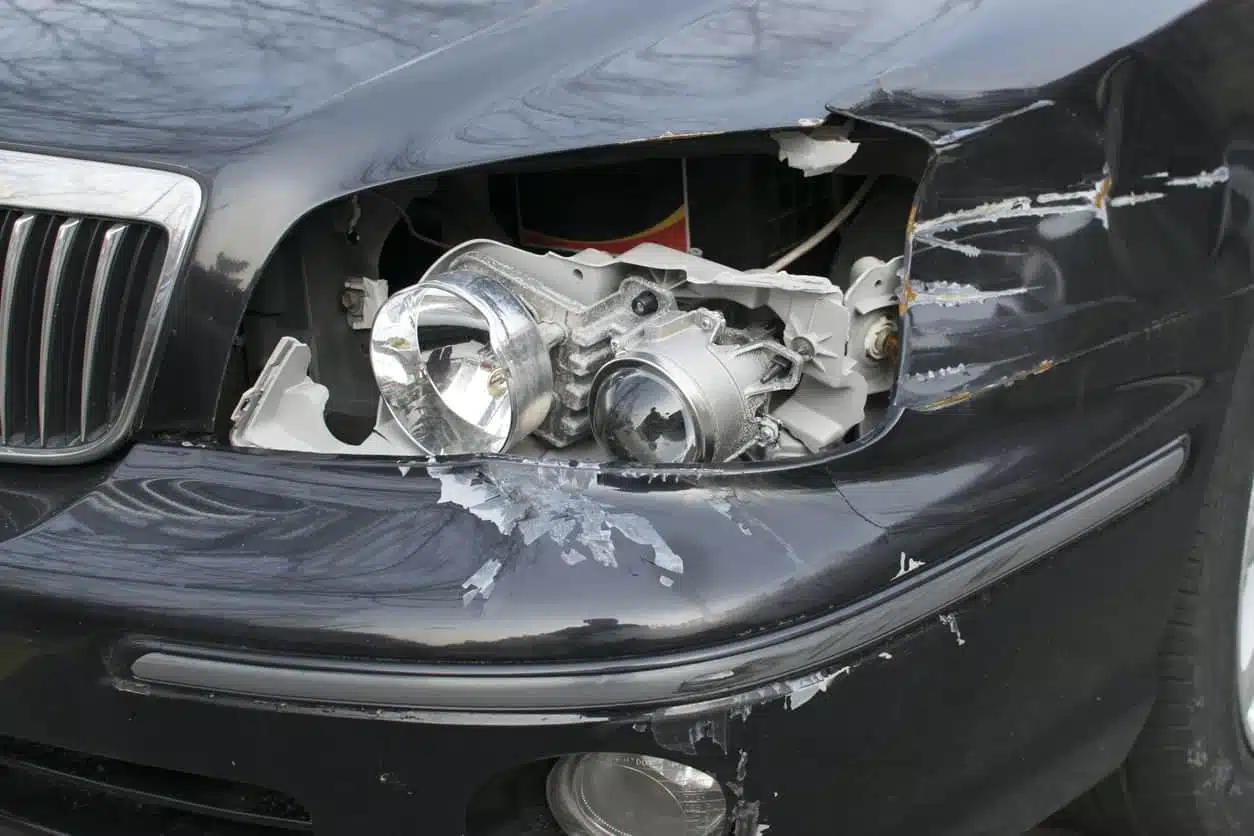
OK, so changing a lightbulb on your car is easy, but what if the headlights are damaged or cracked?
It all depends on how badly damaged the headlight lens is. If there’s only a small crack, you may be able to repair it to prevent moisture getting into the assembly. If the crack is large or the lens is shattered, you’re going to have to get a new headlight.
If you’re confident the crack looks repairable, here’s a quick guide on how to repair a cracked headlight lens.
What You’ll Need
Your usual car washing kit – sponge, shampoo and microfibre drying cloth
Car polish and application cloth – for smoothing out the plastic lens and the area around the crack
Clear silicone sealant – premium super glue, like Loctite Epoxy, also works well
Masking tape – for protecting the unaffected areas of the headlight lens
Paper towel – for removing excess sealant/glue
Repair a Headlight Lens in 5 Simple Steps
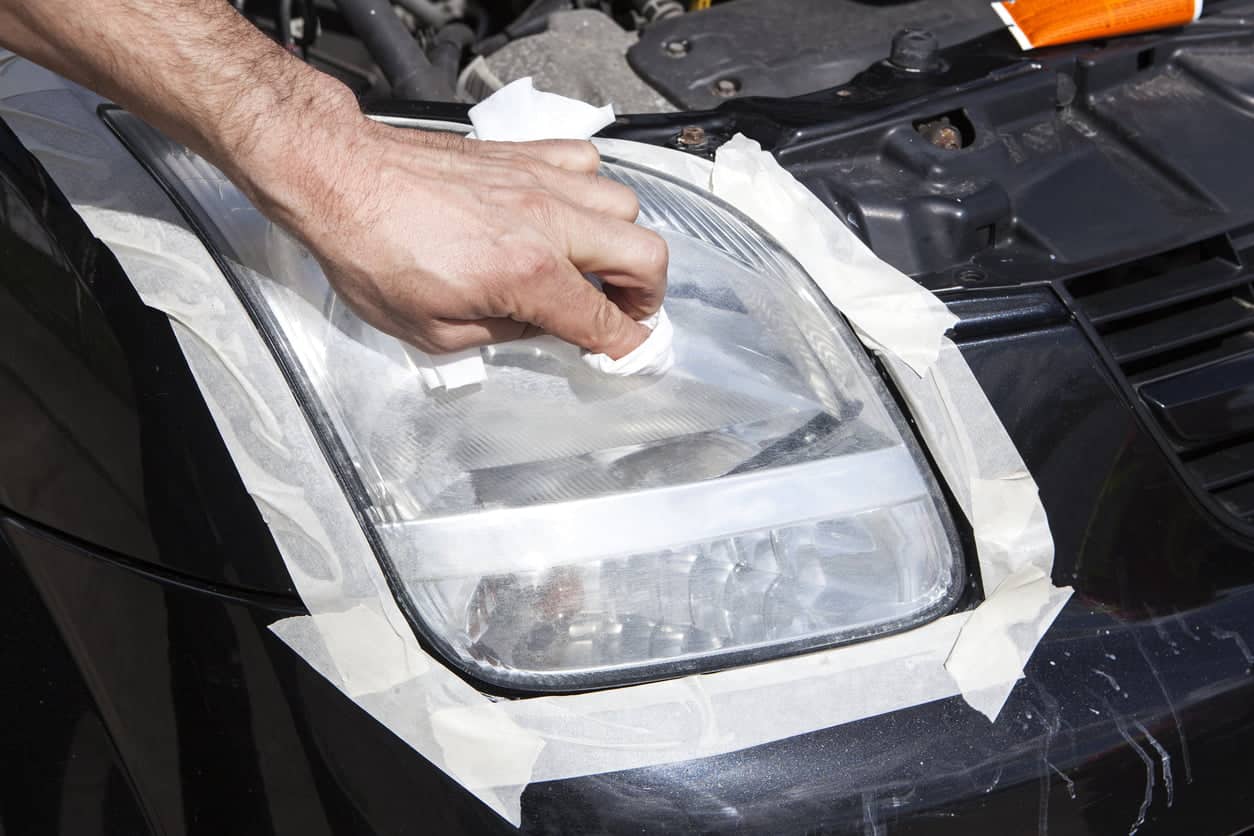
Start by cleaning the affected headlight to remove all traces of dirt, dust and grime. Remember to use the two-bucket method to prevent dirt on the sponge leaving micro scratches on the plastic surface. When you’re done, dry the area thoroughly.
Apply a small amount of car polish to the headlight in a smooth, circular motion. Make sure you apply plenty to the damaged area, as this will even out the surface and help the sealant to stick firmly.
Protect the area of the headlight lens around the damaged area with masking tape.
Apply a thin strip of clear silicone to the crack using a sealant gun, before wiping away any excess with the paper towel. Leave this to set, preferably overnight (make sure your car is covered if rain is forecast). You can also use super glue like Loctite Epoxy to seal the crack.
When the sealant is completely dry, apply another layer of polish to even out the area. Then, apply a generous coating of car wax to help protect the area, and buff to a high shine.
How Much Does it Cost to Replace a Broken Headlight?
If you need to replace the headlight it can cost anywhere between £100 to £750+, depending on the make and model of your car.
As well as being expensive, headlight assemblies can be quite difficult to find. For the best prices, we’d recommend starting with a specialist retailer like Euro Car Parts who let you search by reg number for the right parts.
How to Replace a Headlight Assembly
Replacing a headlight assembly might sound difficult, but it’s really not much harder than changing the lightbulb, so long as you have the right tools to hand. Doing a job like this yourself will help you save on parts and labour charged by a garage, which is only a good thing given how expensive new headlights can be.
What You’ll Need
A new headlight assembly
A wrench and socket set
Phillips screwdriver
Small bags and a permanent marker – for labelling screws and bolts, so you don’t lose any
Replace a Headlight Assembly in 3 Steps
Step 1: Loosen the Front Bumper
First, you’ll need to remove the front bumper to access the headlights. This might sound daunting, but it’s just a matter of loosening a few bolts and screws. What’s more, you only usually need to loosen one side, as most plastic bumpers have enough flex in them to allow you to remove the headlight without completely removing the bumper.
Locate all the bolts that hold the front bumper in place. Normally, there are between 2-4 under the bonnet at the front of the engine and a couple beneath the front of the car. Your manual should show where the bumper connects, or you could invest in a Haynes manual if you’re not sure. Alternatively, online forums are a good place to seek advice for your make and model.
Loosen all the bolts and screws holding the bumper in place. Remember, you’ll probably only have to remove one side of the bumper, as you’ll be able to flex it back to get at the broken headlight.
Make sure you bag and label any bolts and screws you remove, for easy reassembly.
Step 2: Removing the Old Headlight Assembly
Now you should be able to access the headlight assembly. Here are some steps to help you remove the broken headlight:
Disconnect the bulb cables using the plastic connector catch.
Loosen each screw holding the headlight assembly in place. There are normally around three screws, two on top and one on the bottom. You may need a good long screwdriver to get to the bottom screw, depending on the layout of your car.
Slide the old headlight assembly out towards you, being careful that the cable connectors are properly disconnected and out of the way.
Step 3: Installing the New Headlight
It’s time to install the new headlight, which is just a case of retracing your steps and making sure everything is tightened and reconnected.
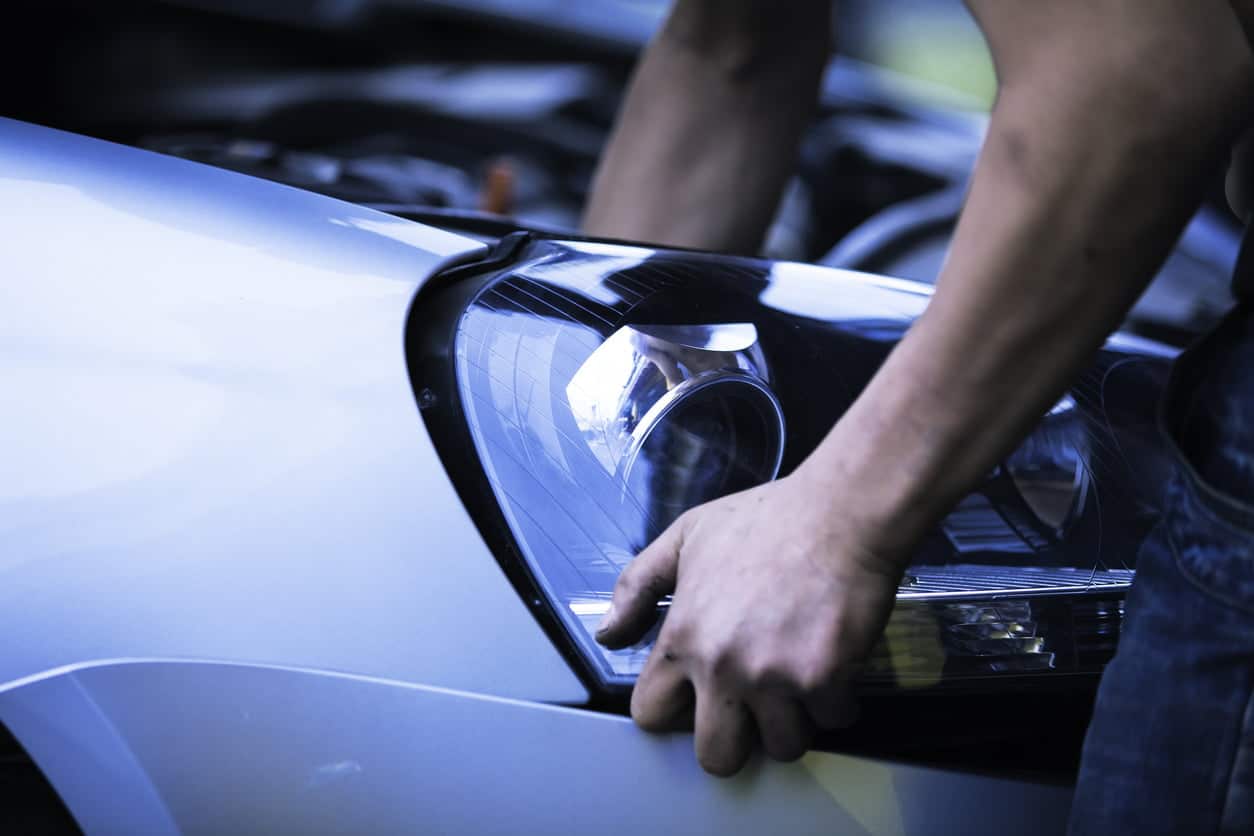
Clean the area where the new headlight will sit, removing any dust and dirt.
Install the new headlight, making sure every connection is tight.
Don’t forget to reconnect the lightbulb cable and test the headlight.
Before fully reconnecting the bumper, make sure the headlight beam is at the right height when dipped. There are a couple of screws which can help you change the height of the beam, so make sure these are adjusted so that the beam is the same as the other headlight.
Holts’ DIY car maintenance range is designed for driveway enthusiasts who like tinkering beneath the bonnet. For our full product collection or for more motoring tips and guides, visit the homepage today.