With the daily wear and tear of transporting kids, groceries and luggage, it’s easy for your car’s interior trim to pick up scratches and marks, or just start to look a little tired.
Scratches on interior surfaces not only look ugly, they can depreciate your car’s value when it’s time to trade-in. No driver wants to see their car’s cabin pockmarked with scratches, but luckily there are things you can do to remove or reduce them.
In this guide, we offer practical steps and top tips for DIY car maintenance involving removing scratches from your car’s interior panels.
Quick navigation
- Types of Interior Car Scratches
- How to Remove Scratches from a Car Interior
- Restoring Interior Plastic Trim
Types of Interior Car Scratches
Different types of interior car scratches can vary in severity, and so should be dealt with differently.
Below, we’ll run through the types you might encounter, how they’re usually caused, and how to avoid them.
Scuffs
Common causes:
Scuff marks usually appear when an object rubs against plastic surfaces in your car’s interior. Dirt or colouring from things like shoes and clothing is then transferred onto the plastic panelling – often as people enter or exit the car.
How to avoid/fix:
These marks are usually superficial and don’t cause any real damage to your car interior. They can often be wiped away, but you can prevent them better by asking passengers to be more careful getting in and out of your car.
Deep Scratches
Common causes:
Scratches are often caused by items like keys, bottles, or tools like screwdrivers rubbing against the car’s plastic interior surfaces.
How to avoid/fix:
Avoiding scratches of this nature will simply require you to check that any sharp objects are safely stored away from the plastic surfaces of your car.
Chips
Common causes:
Daily wear and tear is a common cause of chips appearing in plastic panels. It’s usually something to look out for in older cars, where you’d expect to see more worn-out panelling due to the age.
How to avoid/fix:
Chips are one of the most difficult types of damage to repair. Do your best to preserve any broken pieces that fall off – it’ll be difficult to find similar-looking bits to replace a chipped panel.
Cracks
Common causes:
Areas of panelling that are continuously exposed to direct sunlight can begin to crack. Car interior plastic might also become brittle and start to crack due to the density or quality.
How to avoid/fix:
You can use a windscreen shield or protective cover to protect your car interior from being over-exposed to direct sunlight. Check the condition of your panelling around high-stress areas like the doors where cracks might start to appear.
How to Remove Scratches from a Car Interior
There are two avenues you can go down to remove scratches from your car’s interior panels: buy a specialist kit containing everything you need to remove the scratch, or use a combination of sanding, painting and heating to remove it by hand.
While some kits work well on light scratches and abrasions, we find that the best way is to fix it yourself, especially if the scratch is quite deep. Below, we guide you step-by-step through the process of fixing an interior scratch yourself.
What You’ll Need
For a professional finish when repairing an interior scratch, invest in the following tools and equipment:
- Heat gun – Used to heat and remould the plastic
- Interior grain pad – For retexturing the plastic to duplicate the original
- Sandpaper – Superfine grit works best
- Plastic scratch polish kit – For fixing lighter scratches
- Interior Car Cleaner – Get yourself a quality cleaner that’ll remove ingrained dirt from plastic surfaces, and one that’s designed for use on cars
The Process – Step-by-Step
Step 1: Clean the area on and around the scratch with interior plastic cleaner. Removing all the dirt and debris will help you get a smooth finish and stop dirt from melting into the plastic, which could affect the colour. Make sure the area is clean and dry before you move on to the next step.
Step 2: Using a heat gun (at around half power), gently apply heat to the plastic until it begins to soften. Don’t heat it for too long, as the plastic could warp and burn, leaving you with irreparable damage. You’ll be able to tell when the plastic is ready for moulding, as it will lose its texture and appear slightly glossy.
Step 3: Apply a grain pad to the affected area, using very light pressure. This will smooth out deeper scratches and also give a textured finish to the plastic so that it blends in. Grain pads are available to buy online and usually come in a variety of different finishes. Choose the one that most closely resembles the plastic trim in your car, and apply it to the area using the hard-plastic application pad which comes with the set.
Step 4: Let the area cool and harden. The texture should now look similar to the unaffected area, however, you’ll need to sand it down to ensure a smooth and authentic-looking finish. Use a superfine grain paper to smooth it out where necessary.
Step 5: Clean and dry the area again using the same method as in step 1 – and you’re done.
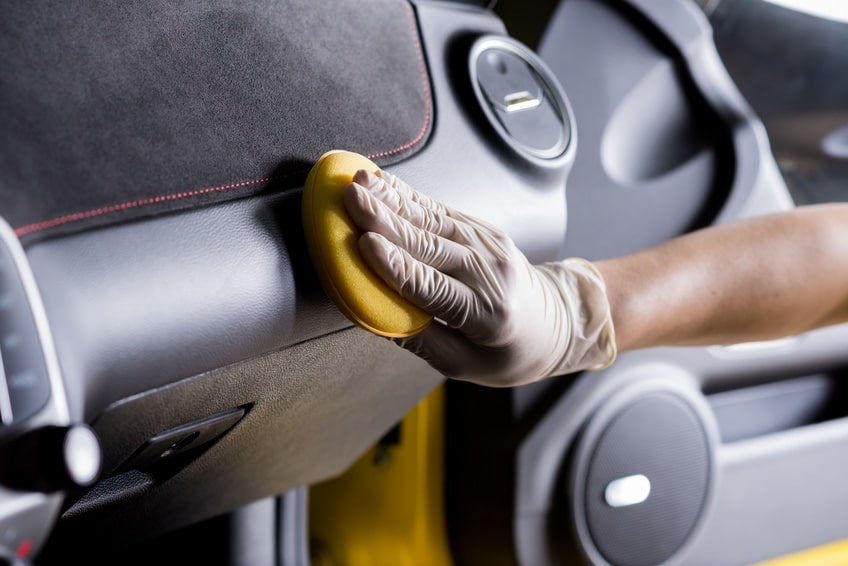
For lighter scratches, you might only need a plastic scratch polish kit. These kits will include everything you need to fix light scratches or marks, such as a plastic cleaner, polishing compound, microfibre towels, and buffing pads.
You’ll usually still need to clean the area and sand it down with superfine grit sandpaper. You can then begin using the buffing pads to apply polish using back-and-forth motions to fill the small scratches. Add another layer using light pressure and allow it to dry before buffing away any excess.
Restoring the Interior Plastic Trim
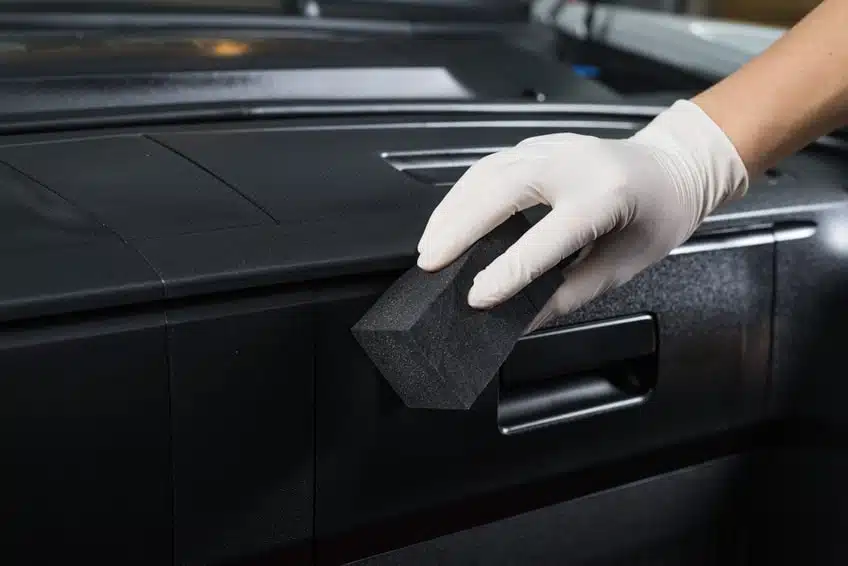
If your car’s interior plastic trim is starting to look a little worse for wear, or the heat gun has discoloured it in any way, use a plastic restorer pad or spray to help restore its colour and shine, leaving it looking refreshed and new.

When using a restorer pad, apply it in a gentle, circular motion and avoid scrubbing too vigorously. Keep the pad in your glovebox so you can easily repeat the process whenever you have a problem with the appearance of your car’s interior.
For more DIY car maintenance guides and advice, don’t forget to check out the rest of the Holts blog and our handy help and advice page. Alternatively, if you need to fix scratches and problems in your car’s paintwork, visit our Paint Match Pro site.