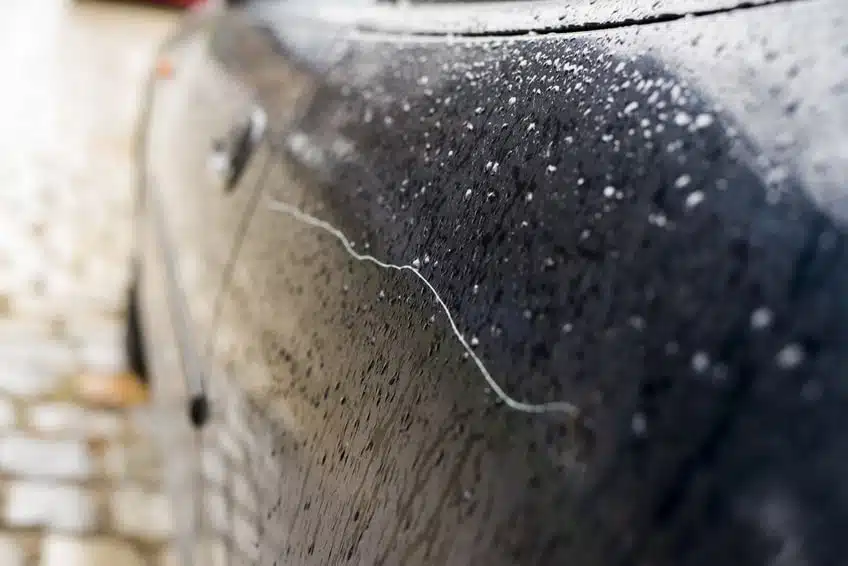
Scratches in your car’s paintwork not only look bad, but can seriously impact the value. So whether you’re enhancing the looks of your pride and joy, repairing a malicious key scratch or touching up the bodywork before selling your daily run-around, Holts has the solution.
Here, we provide a step-by-step DIY guide to repairing scratches in clear coat lacquer.
Step 1: Preparation
Before you begin the repair, make sure the area is clean, dry and free from debris. Using regular car shampoo and a sponge or microfibre cloth, wash the area to remove any dirt and grime, before drying with a microfibre cloth or chamois.
Now that the paintwork is clean and dry you can properly assess the damaged area. If you’re lucky the scratch will only be in the clear coat. In this case, try dragging a finger nail gently across the scratch; if the scratch jags your nail it’s normally too deep to polish out and will need painting.
Use a paint rubbing or cutting compound on and around the scratch – normally a couple of centimetres either side. Working in a circular motion, work the compound to remove a very thin layer of the surrounding clear coat. This will reduce the amount of paint you need to use and help when it comes to blending the clear coat after it has dried. Clean up any excess compound or debris.
Step 2: Applying the Clear Coat
Using masking tape and newspaper, cover the surrounding area to avoid over-spraying the undamaged paintwork. The area you need to mask will depend on whether you will spray the clear lacquer or apply it with a brush – a brush will be more accurate so you won’t need to cover as big an area.
Depending on the width and depth of the scratch, you may choose to spray the clear coat or apply it using a fine paint brush or cocktail stick.
Whichever method you choose, the intention is to build up the clear coat in layers in and around the scratch so that it is higher than the surrounding clear coat. Leave around 10-20 minutes between applications to allow the previous coat to dry. Once you’re happy that the scratch is filled with the final coat, remove the masking tape and paper.
Step 3: Flatten the Area
For best results and depending on the temperature, you may need to leave the paint to harden for a day or two before flattening.
Again, your next steps will be determined by the size of the scratch and the amount of clear coat applied to repair the area. Use either a very fine grit wet and dry sandpaper (for example, 2,500 grit) or an abrasive rubbing/cutting compound. Just as you did in the preparation stage, work in a circular motion a couple of centimetres either side of the repair. If you’re sanding, use progressively finer grit and finish with a polishing compound to achieve a super smooth finish.
Search for your car paint today!
-
Use Paint Match Pro to find your perfect colour match
-
Over 6000 colours matched
-
Find a stockist near you